


Try It Tuesday: Ruffled Pillow
November 12, 2012
So this post was supposed to be a Try it Tuesday about two week ago but Sandy hit and knocked out our power before I could post this! Stupid Sandy!
This would be a great project to do on a rainy day…unless you don’t have power! This would be a lot to sew by hand. This may be one of my more difficult projects, especially if you don’t really know how to sew with a sewing machine.
Materials:
- Sewing Machine
- Fabric
- Thread
- Stuffing
- Scissors
- Zipper (I put one in my pillow but I’m not going to give the exact instructions on how to sew one in, I’ll just make a note where you should insert it if you want one.)
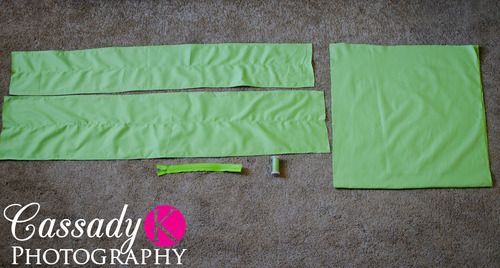
Ok so I decided that I wanted a 18”x18” pillow so I cut two squares that were 19”x19” and then two strips of fabric for the ruffles. The strips were 10”x54” and 8”x54” (the fabric was 54” wide).
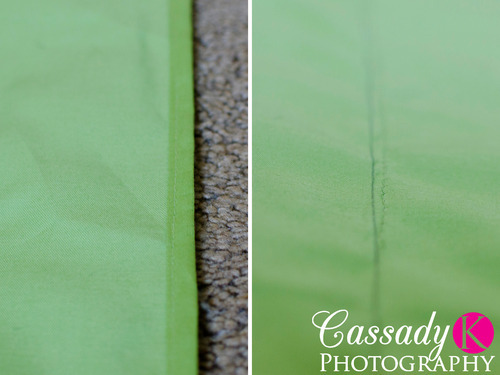
On the two strips of fabric for the ruffles I hemmed the long sides so that the fabric wouldn’t fray by folding the fabric over about a centimeter and then folding it over again about a centimeter. I then pinned it down and sewed along the hem.
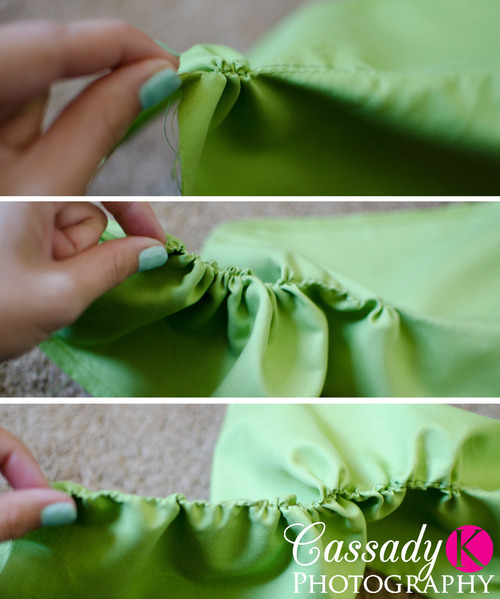
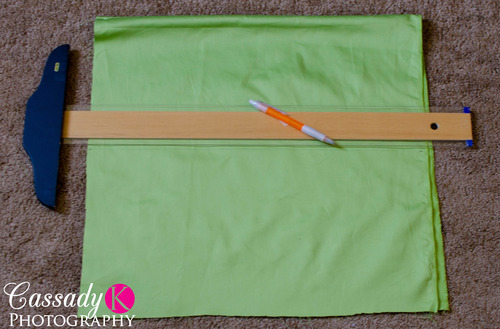
Once I had the sides of the strips of fabric hemmed I drew a light line down the center longways with a pencil and ruler (on the “bad side of the fabric, the side with the hem). I then set the stitch on the sewing to machine to as big and loose as possible and sewed right down the line I had made. (Make sure you don’t go in reverse at all for this step!) Clearly I didn’t do the best job at sewing in on the line…whoops.
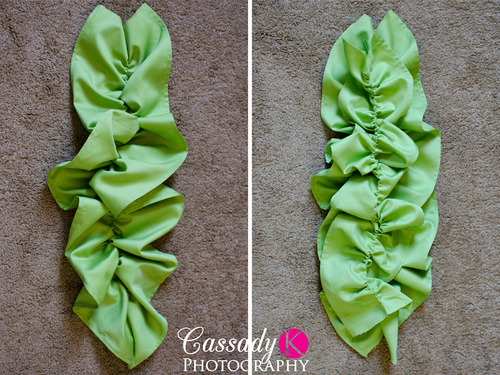
Now that you’ve made the loose stitch you’re going to gather the fabric on the thread to create the ruffles. (This is when I started to get excited because it started to look like something!) I gathered it so that it was slightly longer than 19” because I wanted to sew the end of the fabric strip into the seam of the pillow so it didn’t fray.
Ta daaaa! So you just do that to both fabric strips and lay the 8” on top of the 10”.
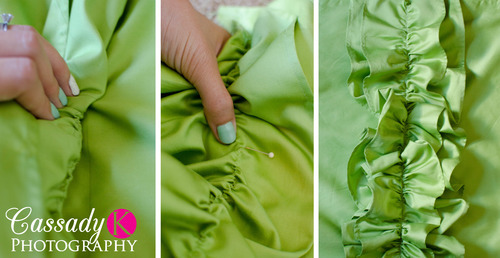
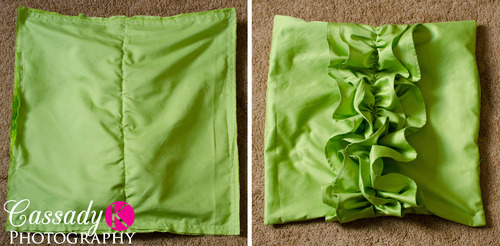
The next part can be a bit frustrating because you have to attach the ruffles to the pillow. Just keep in mind that the ruffles will hide all the flaws. So on one of the square pieces of fabric I drew a light line down the center of the pillow with a pencil and ruler.
Then by kind of feeling where the ruffle is and folding the ruffle back, line it up on the penciled line on the square piece of fabric and pin it. You can either do this one ruffle strip at a time or by holding both ruffle strips together. Once it’s all pinned together make sure that some of the end of the ruffle hangs over the side of the square piece of fabric. Then just sew down the center of the ruffle (I actually sewed down it twice just to make sure it was secure).
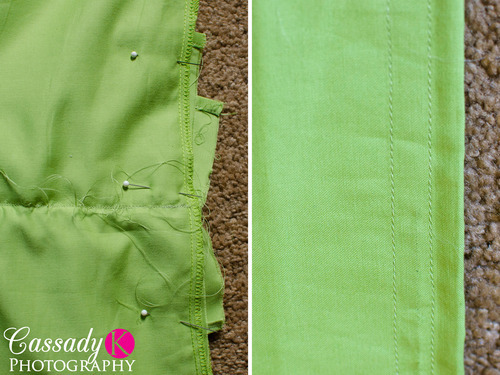
Ok now that ruffle is done and attached to the pillow it’s time to make the actual pillow! This is the easy part! Basically you just lay the two square pieces of fabric on top of each other (so that the ruffles are inside of the pillow because you’re going to turn it inside out later on) and I pinned the sides together. They don’t lay perfectly flat because of the ruffles. Make sure that the edges of the ruffles come out the side so they don’t fray later on. Then I just sewed around the edges twice because I knew they’d be on our couch and they’d be getting a lot of use so I wanted the stitching to be secure. Before you sew around all four sides you either want to insert the zipper or leave a hole about 5” long on one of the sides.
Then you just turn the pillow inside out. Make sure to poke those corners out so they’re pointy, I use a chopstick! Cut off all of the little threads (they drive me nuts and you’ll still find more on the pillows 5 months later).
Fill your pillow with as much stuffing as your want or if you have a pillow to put in it and then zip up the zipper or sew up the side if you didn’t put in a zipper.
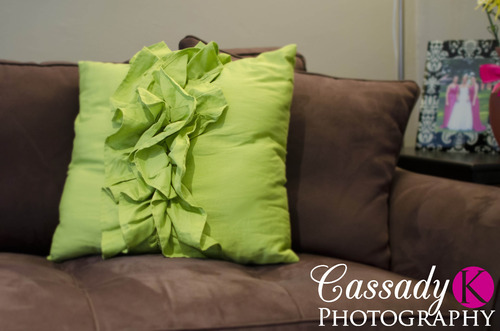
And look how cute! The main color in our living room is gray and black but of course I need some color so our accent color is green! Yay! So I made two of these pillows for about $30 which when I was looking at Bed Bath and Beyond for something similar they were $30 each!
By the way these make perfect napping pillows!! Happy Monday!