


Try it Tuesday: Snickers Cupcakes
September 10, 2012
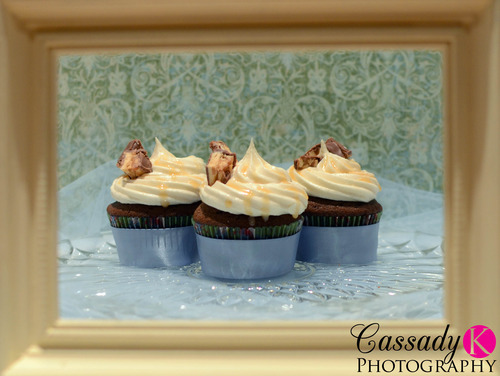
These are one of my favorite cupcakes! Annie’s Eats has some of the best recipes and this is one of them! Now on her blog she also cuts out the middle of the cupcake and fills it with a snickers and caramel mixture. I tried this the first time but I found that once the mixture cooled down it was really hard to eat since the mixture got hard….plus it was a little overwhelming. So instead I put the cut up snickers on top of the icing and drizzle the caramel over the cupcake. Don’t they look yummy?
Snickers Cupcakes – Makes around 20 cupcakes
Ingredients:
- 1/2 cup cocoa powder
- 1/2 cup hot water
- 2 cups all-purpose flour
- 3/4 tsp. baking soda
- 3/4 tsp. baking powder
- 3/4 tsp. salt
- 16 tbsp. unsalted butter
- 1 1/2 cups sugar
- 2 large eggs & 1 egg yolk
- 1 2/4 tsp. vanilla extract
- 2/3 cup sour cream at room temperature
Directions:
To make the cupcakes, preheat the oven to 350 degrees. Line standard cupcake pans with paper liners. In a small bowl, whisk together the cocoa powder and hot water until smooth. In a medium bowl, whisk together the flour, baking soda, baking poser, and salt; set aside.
In a medium sauce pan, combine the butter and the sugar over medium heat. Heat, stirring occasionally to combine, until the butter is melted. Remove the mixture from the heat and transfer to the bowl of an electric mixer fitted with a paddle attachment. Beat on medium-low speed, 4-5 minutes, until the mixture is cooled. Mix in the eggs and egg yolk, one at a time, scraping down the sides of the bowl as needed and beating well after each addition. Mix in the vanilla and then the cocoa mixture and beat until incorporated. With the mixer on low speed add in the dry ingredients in two batches, alternating with the sour cream, beating just until combined.
Divide the batter between the prepared cupcake liners, filling them about 3/4 of the way full. Bake 18-20 minutes or until a toothpick inserted in the center comes out clean, rotating the pans halfway through baking. Allow the cupcakes to cool in the pan 5-10 minutes, then transfer to a wire rack to cool completely.
Caramel Sauce – You’ll need this for the icing & decoration (Also used in the Spiced Pumpkin Cupcakes)
Ingredients:
- 8 tbsp. unsalted butter, cut into pieces
- 1 cup sugar
- 1 cup heavy cream
- 1/4 tsp. vanilla extract
- Pinch of salt
Directions:
To make the caramel sauce, melt the butter in a heavy-bottomed saucepan over medium heat. Add the sugar and cook, stirring occasionally, until the sugar begins to foam a bit. It will look and smell like it’s on the verge of burning. (No really it will foam a lot and turn brown….this is good this is where the caramel get’s it’s color.) Remove from the heat and add the heavy cream. Stir until the sauce is smooth (you may need to return it to the heat to smooth it out), then mix in the vanilla and salt. Let cool. (Side note: the caramel will last for 2 weeks in the fridge…I like to cut up apples and dip them in the caramel.)
Icing:
Ingredients:
- 16 tbsp. unsalted butter at room temperature
- 1 lb. confectioners’ sugar
- 1 1/2 tsp. vanilla extract
- 1/3 cup caramel sauce
- Pinch of salt
- 2 tbsp. heavy cream
Directions:
For the icing, add the butter to the bowl of an electric mixer. Beat on medium-high speed for 1 minute until smooth. Blend in the confectioners’ sugar until smooth, 1-2 minutes. Mix in the vanilla, caramel sauce and salt until incorporated. (Note: the caramel sauce should be just warm enough that it is workable, but not warm enough to melt the butter.) Add the heavy cream and whip on high speed until light and fluffy, about 3/4 minutes.
I then transferred the icing to a pastry bag fitted with a decorative tip. After icing I drizzled the frosted cupcakes with additional caramel sauce and chopped up Snickers bars as a decoration. Ta-da!!